


This article will act as a guide for beginners, right from finding a project, to getting their first Pull Request merged.
In today's times, open source is a very powerful tool. It is a great way for beginners to practice their coding skills, for developers to get project-work experience without committing to a full-time job and for projects to get their products built by essentially crowdsourcing the software development process. GitHub is home to a vast majority of open source projects, waiting to get built by contributors. With all this hype surrounding open source, a beginner is ought to find it overwhelming to just open GitHub and start contributing.
This article will cover:
- Looking for a project
- Understanding the project
- Setting it up on your local machine
- Taking up an issue
- Making your first PR.
- Bonus!
- Conclusion
1. Looking for a project:
The first step you need to take is, to find a project that fits your interests or matches your tech stack. You could use 2 approaches here: Top-down or Bottom-up. In the top-down approach, you find a project that works in a language/software/framework you are already familiar with and start contributing based on things you already know. In the latter approach, you find a project that grabs your interest and don't worry about your tech stack. Here, you will work on building your skills according to the project and your task to make contributions. No matter what approach you decide to choose, it is going to be a learning curve.
Contributions, small or large, open source always welcomes it with open hands. Even if you have no sort of coding background, you could always work on improving and contributing to the documentation of the projects, which, trust me, is of great value to any project.
2. Understanding the project:
Once you have chosen a project, consider that you have entered the playgrounds.
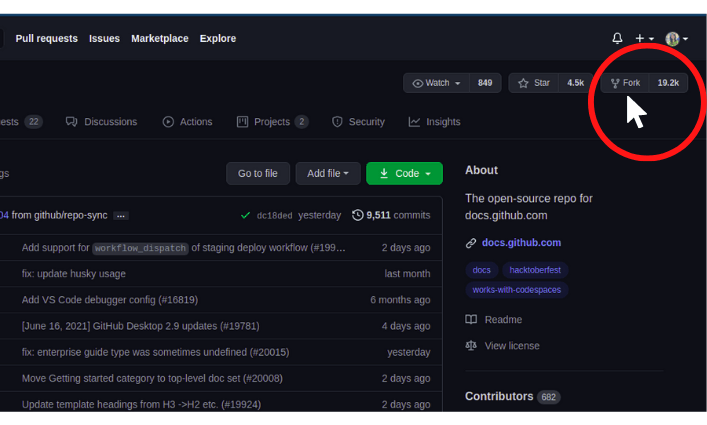
The first thing you have to do is, Fork the repository, which means creating your very own copy of the codebase in your GitHub account, allowing you to freely explore the project without affecting the original project.
Have a thorough look at the README.md file, which will act as a guide about the objective, requirements, and working of that repository. Be a part of the community of the project by joining their discord servers or slack channels, if they have any mentioned, which will familiarise you with the admins and maintainers, who will guide you throughout and resolve your queries.
3. Setting it up on your local machine:
Once you have established an interest, you'll have to understand how the project actually works. The following 2 steps will help you set the project up in your local system, which will act as a local repository of the project:
Cloning: It creates a copy of the project in your local system. In your terminal, enter the following commands.
 git clone https://github.com/<your_username>/<project_repo_name>
 cd <project_repo_name>
 git remote add upstream https://github.com/<project_admin_username>/<project_repo-name>
In the last command, we add an upstream to our local copy, in order to keep it synced with the changes made with reference to the original repository .
Rebasing: In order to keep your forked repository updated with the original project, in the case that it has undergone changes, we perform rebasing.
 git remote update
 git checkout <branch_name>
 git rebase upstream/<branch_name>
In
branch_nameenter the branch which you want to keep updated. For eg:master,main, or any off-branches.
Now, that you have set up the project, run the project on local system (by following the instructions in README.md) and get acquainted with its workflow.
4. Taking up an issue:
When it comes to working on issues, you can follow 2 approaches. You can either create an issue or work on already existing issues.
When you run the code on your system, and you come across bugs or feel that the project needs a feature, you can go ahead and present your suggestions as an issue.
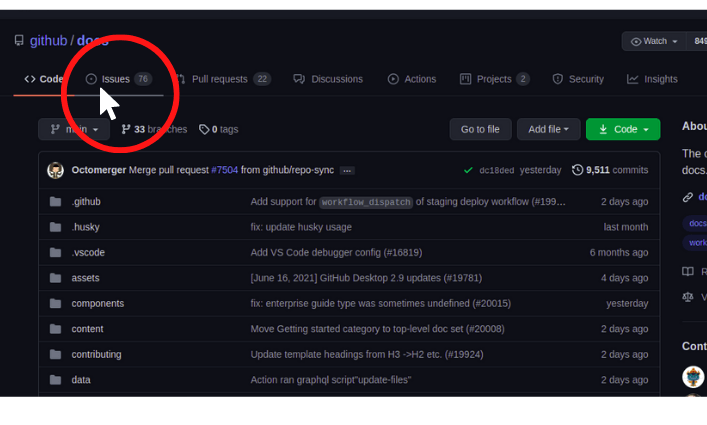
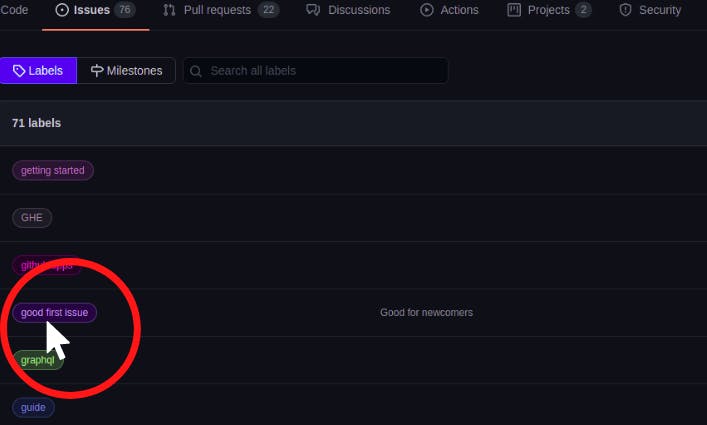
You could also look up the already existing open issues and discuss it with the project admin about how you are willing to contribute to it. If you are a beginner, I recommend you to look for the issues with the label good first issue which are designated for beginners/newcomers only.
The project admin will respond to your issue with appropriate feedback and will accordingly give you the green signal to start working on it.
Keep in mind that, whenever you are creating an issue, you have to be very descriptive of the type of change you are proposing. This will ensure that the project admin understands the importance of your issue and it's value to the project.
5. Making your first PR:
Now it's time to get your hands dirty.
You write the required code in your local system's project repository and make sure it works perfectly, throws no errors, follows all the clean code practices and it's well commented so that anyone can understand the code by just a glance. So, it's time to make your first Pull Request (PR). PRs let you tell others about the changes you've proposed to a repository.
Here are the steps to follow:
Branching: It is a conventional practice to never make changes in the master/main branch of your forked repository. We always create a PR from a new branch to ensure a clean commit history.
git checkout -b <branch_name>This command will switch to the new branch or create one if its doesn't already exist.
Adding the files: In your local repository, place the files that you created in the appropriate folder and then enter the following commands.
git add.This will stage all the files you created to the current branch created above.
Track the status of your files by
git statusCommitting and creating a PR: All the changes you have staged needs to be committed as follows:
git commit -m "Descriptive commit message"We need to push these committed changes to the remote repository by
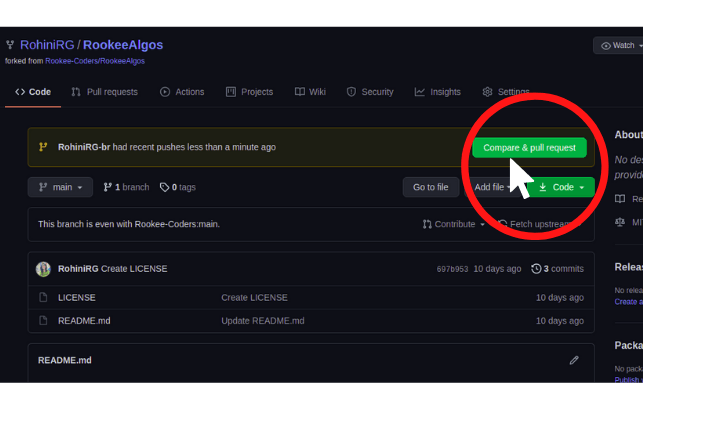
git push -u origin <branch_name>Go to your forked repository and you'll see this notification for creating a PR.
 Make sure your description for the PR is clear with the appropriate title and gives all the necessary details of the changes you made. Don't forget to add
 #issue_numberas well.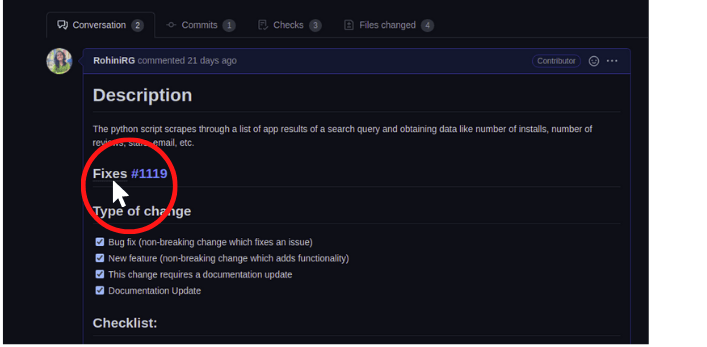 Click on the create pull request button and pat yourself on the back as you have successfully created your 1st PR!
You now have to wait for the project admins to respond, review your proposed changes and make the requested updates, if any, by following the same procedure mentioned above.
I do understand that the process of creating a PR can be overwhelming and occasionally you may face some difficulties/conflicts. In case you face any problems refer here.
6. Bonus:
If you are a student, make sure to grab yourself the perks that GitHub offers through its GitHub Student Education pack where you will not only get a cool 'pro' label on your profile but also provides the best developer tools you will require for any domain.
7. Conclusion:
Open source is driven by its community. The community is very welcoming, especially to the ones who are just getting started. So if you require any assistance feel free to ask your queries, and never hesitate. Initially, mistakes are ought to happen but don't worry as the community is here to help you figure it out and your mistakes are going to be your best teacher. Be a part of the community; Interact, share, and help others in getting their doubts solved. This will help you to build your own network as well as learn skills and lessons from others' experiences, which will help to pave your own career. And always remember, that your contributions matter!
So, go ahead and embark on your open source journey. Create your own projects and help others build their projects. If my article in any way helped you or if you learnt anything from this, connect with me on any of my socials and let me know, I'd be way too pleased to hear from you!
Keep learning & exploring!